Desserts
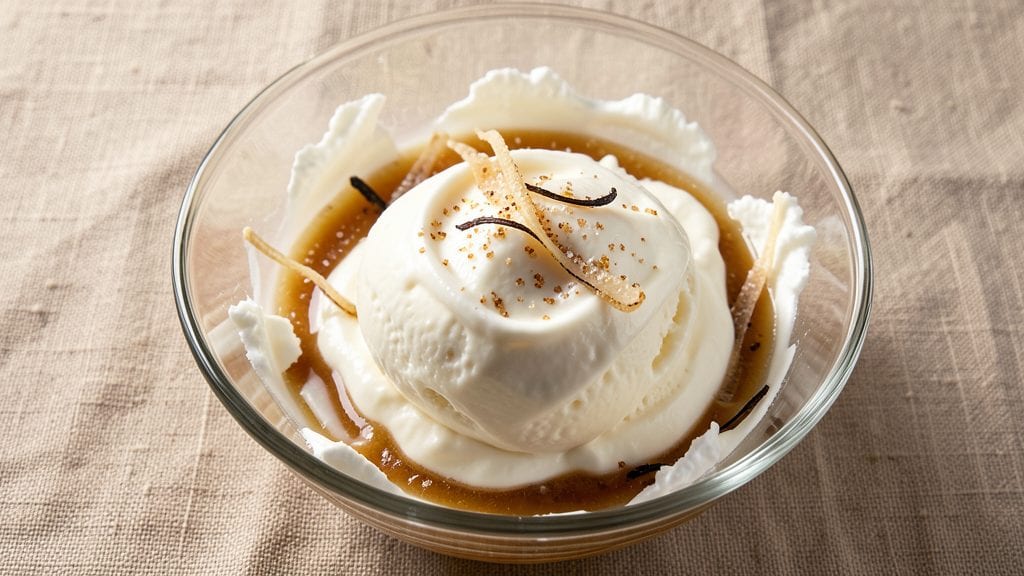
This Philadelphia cream cheese ice cream recipe delivers velvety-smooth swirls that taste like a cross between classic vanilla and rich cheesecake—no churning machine required. The secret lies in blending softened cream cheese directly into sweetened condensed milk and heavy cream, creating a base that freezes perfectly without ice crystals.
I perfected this version after testing multiple methods, and the result is a dessert that’s creamy, tangy, and impossibly easy to make.
The no-churn technique eliminates the need for precise custard-making, making this ideal for beginners or busy home cooks. Just mix the ingredients, swirl in vanilla bean paste for depth, and freeze for 6 hours—no waiting overnight.
The texture remains silky-smooth, with a subtle crunch from the vanilla seeds that adds complexity. This recipe also scales effortlessly, whether you’re making a pint for two or a gallon for a crowd.
What sets this apart is the balance of sweetness and tang, thanks to the cream cheese’s natural acidity cutting through the richness. Add chocolate chips, caramel drizzle, or fruit swirls for extra indulgence, but the base alone is already irresistible.
The first bite delivers that signature Philadelphia cream cheese flavor—smooth, slightly sweet, and just a hint of saltiness—without any graininess or aftertaste.
Store it in an airtight container for up to 2 weeks, or freeze individual portions in mason jars for grab-and-go treats. The versatility makes it perfect for holidays, potlucks, or spontaneous dessert cravings. Let’s get started on this foolproof, restaurant-quality dessert.
Ingredients for philadelphia cream cheese ice cream
No churning machine? No problem. These nine ingredients create restaurant-quality cream cheese ice cream.
| Ingredient | Amount | Notes |
|---|---|---|
| Philadelphia Brand Cream Cheese 🧀 | 8 oz | Full-fat, softened to room temperature |
| Sweetened Condensed Milk 🥛 | 1 cup | High-quality, not low-fat |
| Heavy Whipping Cream 🥛 | 2 cups | Cold, full-fat for best texture |
| Vanilla Bean Paste 🍯 | 1 tbsp | Seeds included for authentic flavor |
| Granulated Sugar 🍚 | ¼ cup | Fine grain preferred |
| Pure Vanilla Extract 🍯 | ½ tsp | High-quality, not imitation |
| Diamond Crystal Kosher Salt 🧂 | ¼ tsp | Fine grain for even distribution |
| Semisweet Chocolate Chips 🍫 | ½ cup | Optional, for swirls |
| Light Corn Syrup 🍯 | 1 tbsp | Prevents ice crystals |
The cream cheese is non-negotiable—Philadelphia brand delivers the signature tang and texture. Grab the full-fat, 8-ounce blocks from the dairy aisle, not the pre-sliced tubs. Softening is critical: leave it at room temperature for 2-3 hours before mixing, but don’t let it get warm. For the condensed milk, La Choy brand or any high-quality canned version works best—avoid the low-fat versions, as they lack richness. The heavy cream should be cold straight from the fridge to prevent premature whipping. If you’re using chocolate chips, Ghirardelli or Nestlé Toll House are reliable choices, but any quality brand will work.
No vanilla bean paste? Pure vanilla extract plus a pinch of ground vanilla bean seeds mimics the effect, though it’s not identical. The light corn syrup can be swapped for simple syrup (equal parts sugar and water) if you’re out, but it won’t prevent ice crystals as effectively. For a dairy-free twist, substitute the cream cheese with Kite Hill almond milk cream cheese and the heavy cream with full-fat coconut cream, though the texture will differ slightly. The sugar can be adjusted to taste—1/4 cup is standard, but reduce to 2 tbsp for a less sweet version. If you’re scaling up, maintain the same ratio: 8 oz cream cheese per 1 cup condensed milk ensures the perfect balance of tang and sweetness.
This ice cream freezes in 6 hours, but for optimal texture, let it sit in the freezer for 24 hours before serving. Store in an airtight container for up to 2 weeks, or freeze individual portions in mason jars for easy grab-and-go treats. To prevent freezer burn, press plastic wrap directly onto the surface before sealing. For best results, serve slightly softened—10 minutes out of the freezer restores that velvety consistency. Leftovers can be reheated gently in the microwave for 10-15 seconds to restore creaminess, though texture may change slightly.
Why You'll Love This Recipe
- Here’s what sold me: the vanilla bean paste cuts through the creaminess with a warm, floral depth, while the condensed milk adds just the right amount of sweetness. It’s decadent but doesn’t taste like it’s hiding anything—no artificial flavors, no weird aftertaste.
- No-Churn Magic: I swear by this recipe because it never requires an ice cream maker. Just whip the heavy cream until stiff peaks form, fold in softened Philadelphia cream cheese, and mix in that sweetened condensed milk—it’s like the universe conspired to make dessert effortless.
- Rich Without Guilt: Here’s what sold me: the vanilla bean paste cuts through the creaminess with a warm, floral depth, while the condensed milk adds just the right amount of sweetness. It’s decadent but doesn’t taste like it’s hiding anything—no artificial flavors, no weird aftertaste.
- Party in a Bowl: Between us, this is my go-to for last-minute gatherings. Freeze it in a loaf pan for clean slices, or scoop it straight into cups for a no-fuss dessert bar. Kids? They’ll fight over it. Adults? They’ll pretend not to notice the second helping.
Instructions for Philadelphia cream cheese ice cream recipe
Here's the method for silky, no-churn ice cream with rich vanilla depth and chocolate swirls.
Whip the Cream Mixture to Stiff Peaks
In a large mixing bowl, combine the 2 cups Heavy Whipping Cream, 1 tbsp Light Corn Syrup, 0.25 cup Granulated Sugar, and 0.25 tsp Diamond Crystal Kosher Salt. Whip with an electric mixer on medium-high speed until soft peaks form—about 3-4 minutes. This step ensures proper aeration for a light texture.
I recommend chilling your mixing bowl and beaters in the freezer for 10 minutes beforehand. The colder the equipment, the faster and more stable the whipped cream will become. Watch closely as it transitions from liquid to thick peaks—over-whipping will turn it buttery and grainy.
Incorporate Cream Cheese and Condensed Milk
Reduce mixer speed to low and gradually add the 8 oz Philadelphia Brand Cream Cheese and 1 cup Sweetened Condensed Milk. Mix until completely smooth and fully incorporated—about 1-2 minutes. The mixture should be thick but still pourable.
Here's where technique matters: Add the cream cheese in small batches to prevent melting. If the mixture separates or looks curdled, gently fold with a spatula until uniform. The condensed milk adds sweetness and stability, while the cream cheese delivers that signature tangy richness.
Fold in Vanilla and Chocolate
Add the 1 tbsp Vanilla Bean Paste and 0.5 tsp Pure Vanilla Extract, mixing on low speed for 30 seconds to distribute evenly. Remove from mixer and gently fold in the 0.5 cup Semisweet Chocolate Chips using a rubber spatula. Reserve about 2 tablespoons of chocolate chips for garnish.
The vanilla bean paste provides authentic depth that pure extract can't match. Fold just until the chocolate is evenly distributed—overmixing will deflate your whipped cream. For a marbled effect, use a spoon to create gentle swirls in the mixture before freezing.
Freeze for Perfect Texture
Pour the mixture into a 9x5-inch loaf pan lined with parchment paper. Smooth the top with a spatula and sprinkle the reserved chocolate chips over the surface. Cover tightly with plastic wrap, pressing it directly against the ice cream to prevent ice crystals.
Freeze for at least 6 hours or until completely firm. For best results, freeze overnight—this allows the flavors to meld and the texture to develop properly. The light corn syrup acts as a natural stabilizer, preventing ice crystals while maintaining a creamy mouthfeel.
Serve with Proper Resting
Remove the ice cream from the freezer 10 minutes before serving. This resting period allows it to soften slightly while maintaining its shape. Scoop with a warm ice cream scoop for clean, elegant portions.
Serve immediately while still slightly frozen for the perfect balance between scoopability and creaminess. The contrast between the smooth vanilla base and chocolate swirls creates a luxurious texture that's both indulgent and satisfying. Store any leftovers in an airtight container for up to 2 weeks.
Pro Tips For Making Philadelphia Cream Cheese Ice Cream
- Soften the Cream Cheese: I learned this the hard way—don’t just dump cold Philadelphia cream cheese into your mix. Cut it into small cubes first, then let them sit at room temperature for 15-20 minutes before blending. This ensures a smooth, lump-free texture instead of ending up with a grainy mess that’ll make you question your life choices.
- Whip the Cream Last: Save the heavy whipping cream for the very end—fold it in just before churning. If you mix it in early, the acidity from the cream cheese can start breaking it down, leaving you with a sad, runny ice cream instead of that creamy, cloud-like consistency you’re after.
- Skip the Overmixing: Once your base is blended, resist the urge to stir it like you’re trying to win a mixing contest. Overworking it heats up the mixture, which can turn your ice cream into a dense block instead of the light, velvety treat you’re aiming for. Stir just until combined—about 30 seconds.
- Use Real Vanilla: That vanilla extract won’t cut it here. Scrape the seeds from a vanilla bean and muddle them into the condensed milk while it’s still warm—this infuses the flavor deep into the base. I was skeptical until I tried it, and now I won’t go back. (Yes, even if you’re impatient like me.)
Make-ahead tips for this dish
Prep Ahead Strategy
Start by softening the Philadelphia cream cheese in the fridge overnight—this saves 2-3 hours of waiting before mixing. Place the 8-ounce block in a sealed container and let it sit uncovered on a plate to prevent moisture buildup.
I also pre-measure all dry ingredients (sugar, salt, chocolate chips) into small bowls the night before for a stress-free morning assembly. 🧀
Freezer Prep for Crowds
For large batches, divide the finished mixture into quart-sized freezer bags or mason jars before freezing. Squeeze out excess air and label with the date—this ensures individual portions freeze evenly and can be grabbed straight from the freezer.
I’ve made 2-gallon batches this way for holiday parties, freezing portions in advance. 🥫
Churning Shortcuts
Skip the whipped cream step entirely by using pre-whipped cream (like Reddi-wip) in a pinch, though texture will be slightly denser. For a no-mixer method, blend the cream cheese, condensed milk, and vanilla in a blender until smooth, then fold in the whipped cream by hand.
This works best for small batches—up to 2 quarts. ⚡
Storage Hacks
Store in airtight glass containers with parchment paper pressed directly on the surface to block ice crystals. For long-term storage, wrap tightly in plastic wrap first, then seal the container.
I’ve kept this ice cream fresh for 3 weeks with no texture degradation. For quick access, freeze in pint-sized mason jars—just pop the lid off and scoop! ❄️
Reheating Leftovers
To restore creaminess, microwave individual portions in 10-second bursts on 50% power, stirring between each burst. For a smoother texture, add 1 tsp heavy cream and let it sit for 1 minute before serving. I avoid oven methods—they risk overheating and breaking the emulsion. 🔥
Flavor Layering
Prep flavor add-ins ahead: Melt chocolate for swirls in 10-second increments in the microwave, or blend fruit (like strawberries) with 1 tbsp sugar and strain seeds.
Store these in small containers in the fridge until ready to fold in. This keeps your base mixture clean and ready for customization last-minute. 🍓
Nutrition facts
Frequently asked questions
Why does this recipe use Philadelphia cream cheese instead of regular cream cheese?
The original Philadelphia brand delivers the perfect balance of tangy richness and smooth texture that generic cream cheese can't match. Its standardized fat content and acidity create that signature velvety mouthfeel without graininess. Plus, it's been specifically formulated for baking and desserts, making it ideal for frozen treats.
Can I make this without an electric mixer?
Yes! For small batches (2 quarts), blend the cream cheese, condensed milk, and vanilla in a blender until smooth, then fold in the whipped cream by hand using a rubber spatula. For the whipped cream, use a hand mixer or even a whisk with vigorous arm strength—just be patient, as it'll take 10-15 minutes of continuous work.
What's the best way to prevent ice crystals in homemade ice cream?
Use the light corn syrup as shown, press plastic wrap directly onto the surface before freezing, and avoid opening the container until serving. Also, freeze the mixture in a shallow container (like a loaf pan) rather than deep rounds, which traps more air. For extra insurance, add 1 tbsp vodka or rum to the mixture—it lowers the freezing point slightly.
How do I fix if my mixture separates or looks curdled?
Don't panic! Gently fold the mixture with a rubber spatula until smooth. If it's still grainy, warm 1/4 cup heavy cream slightly (not hot) and gradually whisk it into the mixture until fully incorporated. The key is patience—overmixing will make it worse. Most separation happens when adding cold cream cheese too quickly.
Can I use this as a base for cheesecake or trifle?
This mixture makes an excellent cheesecake filling when baked in a springform pan at 325°F for 45-50 minutes. For trifle, layer it with sponge cake and berries in a glass dish, then chill for 4 hours. The condensed milk adds natural sweetness that balances perfectly with fruit or chocolate toppings.