
Desserts
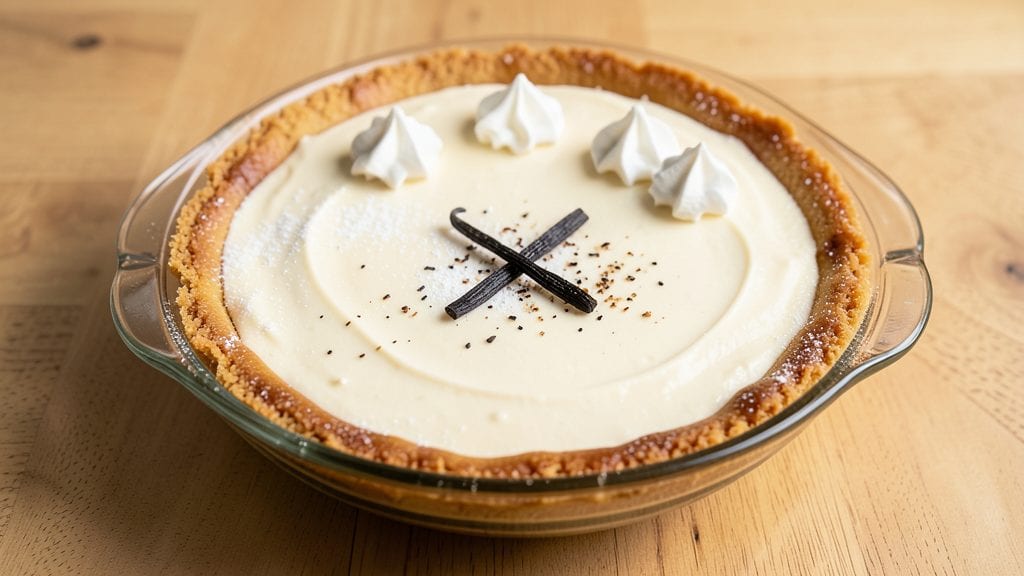
A Philadelphia cream cheese baked cheesecake with velvety vanilla bean swirls and a buttery crust delivers the perfect balance of rich, creamy texture and elegant presentation.
The secret lies in a precise water bath technique that ensures a silky-smooth finish without cracks, while the vanilla bean swirl adds a luxurious touch that elevates this classic dessert.
I’ve perfected this recipe over years of testing, and the result is a cheesecake that’s both restaurant-worthy and surprisingly simple to make at home.
The foundation of this recipe is a buttery graham cracker crust that stays perfectly crisp, even after baking, while the filling combines Philadelphia cream cheese with a touch of sour cream for extra tenderness.
A vanilla bean paste swirled into the batter creates those coveted marbled patterns, and the water bath method guarantees a smooth, jiggly texture without overbaking. This isn’t just another cheesecake—it’s a showstopper that tastes as good as it looks.
By the time you pull it from the oven, you’ll have a cheesecake with a golden crust, silky-smooth layers, and just the right amount of vanilla sweetness. The water bath prevents cracks while keeping the center perfectly set, and the vanilla swirls add a touch of sophistication.
Whether you serve it with fresh berries, a drizzle of chocolate ganache, or a dusting of powdered sugar, this cheesecake will be the star of any dessert table.
Ready in about 90 minutes (including cooling time), this recipe is designed for success—no fancy equipment, just a few key techniques and high-quality ingredients. The crust is foolproof, the filling is foolproof, and the swirls are foolproof, so you’ll end up with a dessert that’s worth every bite.
Let’s get started!
Ingredients for philadelphia cream cheese baked cheesecake
High-quality cream cheese, graham crackers, and vanilla bean create a flawless baked cheesecake with restaurant-quality swirls.
| Ingredient | Amount | Notes |
|---|---|---|
| Philadelphia Cream Cheese 🧀 | 32 oz | Room temperature for blending |
| Large Eggs 🥚 | 4 whole | Room temperature for best texture |
| Granulated Sugar 🍚 | 1 ½ cups | Superfine preferred for smoothness |
| Sour Cream 🥛 | ½ cup | Full-fat for optimal creaminess |
| Vanilla Bean Paste 🌿 | 2 tbsp | High-quality for authentic flavor |
| Graham Cracker Crumbs 🍪 | 2 cups | Fine texture preferred |
| Unsalted Butter 🧈 | ½ cup | Melted for crust binding |
| Diamond Crystal Kosher Salt 🧂 | ½ tsp | Fine grain for even distribution |
| Light Cornstarch 🌾 | 2 tbsp | Prevents graininess in filling |
| Heavy Whipping Cream 🥛 | ½ cup | Optional for swirl enhancement |
| Powdered Sugar 🍚 | 2 tbsp | For final dusting |
| Vanilla Extract 🌿 | 1 tsp | Pure Madagascar preferred |
| Water 💧 | 1 cup | For water bath |
The Philadelphia cream cheese must be at room temperature—no shortcuts here. Philadelphia brand is non-negotiable for its consistent fat content and tang. For the crust, Honey Maid graham crackers yield the finest crumbs, but any high-quality brand works. The vanilla bean paste from Madagascar delivers the most authentic flavor, though high-quality extract is a suitable alternative. Pre-grate your own Parmesan-style cheese if you're using it in the crust—store-bought pre-shredded contains anti-caking agents that prevent proper binding.
Substituting Neufchâtel cheese for half the cream cheese adds a subtle tang, while mascarpone can replace the sour cream for a richer texture. If you can't find vanilla bean paste, pure vanilla extract plus scraped seeds from one bean works. For the crust, digestive biscuits or shortbread cookies create delicious variations. The water bath is critical—use a deep roasting pan and add water halfway up the springform sides to prevent cracks. If you're short on time, pre-bake the crust for 10 minutes to ensure it stays crisp.
Store the baked cheesecake in an airtight container in the refrigerator for up to 5 days, though it's best enjoyed within 3 days for optimal texture. For longer storage, freeze portions for up to 3 months, thawing at room temperature before serving. The crust remains crisp when stored properly, and the filling maintains its silky texture. To serve, dust with powdered sugar or garnish with fresh berries for a refined presentation. Leftovers reheat beautifully in the microwave for 10-15 seconds to restore creaminess.
Why You'll Love This Recipe
- Here’s what sold me: the way the baked center stays unbelievably creamy while the edges get that golden, slightly crisp edge. No cracks, no sinking—just that perfect slice where the knife comes out clean. And honestly? The first bite is worth the whole recipe.
- I’ll be real: I always make a double batch. The baked texture holds up in the fridge for days, and it reheats beautifully—whether you’re tossing slices into a breakfast quiche or serving it cold with a drizzle of honey. Minimal waste, maximum satisfaction.
Step-by-step instructions for Philadelphia cream cheese baked cheesecake
Here's the precise method for achieving a silky, crack-free cheesecake with a buttery crust and signature vanilla swirls.
Prepare the Buttery Graham Cracker Crust
Preheat your oven to 325°F and position a rack in the lower third. Melt the 0.5 cup unsalted butter in a small saucepan over low heat until completely liquid, then remove from heat. In a medium bowl, combine the melted butter with the 2 cups graham cracker crumbs and 0.5 tsp diamond crystal kosher salt, mixing until evenly moistened.
Press the crumb mixture firmly into a 9-inch springform pan, using the back of a measuring cup to create an even, compact base. Bake for 10 minutes until lightly golden. Remove from oven and let cool slightly—this prevents melting when the filling goes in. The crust should be firm enough to support the weight of the cheesecake filling without breaking.
Blend the Cheesecake Filling to Perfection
In a large mixing bowl, combine the 32 oz Philadelphia cream cheese (at room temperature) with the 1.5 cups granulated sugar and 2 tbsp vanilla bean paste. Beat with an electric mixer on medium speed until completely smooth and creamy—this ensures no lumps in your final cheesecake. The mixture should be pale yellow and homogeneous.
Add the 4 whole large eggs (also at room temperature) one at a time, mixing just until each is fully incorporated after addition. Scrape down the sides of the bowl between additions to maintain even blending. Stir in the 0.5 cup sour cream and 2 tbsp light cornstarch until fully combined. The batter should be thick but pourable—if it's too thick, gently fold in 1-2 tablespoons of water to achieve proper consistency.
Create the Vanilla Swirl and Assemble
In a separate bowl, whip the 0.5 cup heavy whipping cream until soft peaks form. Gently fold in the 1 tsp vanilla extract and 2 tbsp powdered sugar until fully incorporated. This lighter mixture will create beautiful swirls in the finished cheesecake.
Pour half of the cheesecake batter into the prepared crust, spreading it evenly. Using a rubber spatula, dollop spoonfuls of the vanilla cream mixture over the batter, then gently swirl with the spatula to create marbled patterns. Pour the remaining cheesecake batter over the cream, gently tapping the pan on the counter to release any air bubbles. The filling should come just to the top edge of the crust.
Bake with Precision in a Water Bath
Wrap the springform pan tightly with heavy-duty aluminum foil, sealing it completely to prevent water from seeping in during baking. Place the pan in a large roasting pan and pour the 1 cup water into the bottom of the roasting pan—this creates a water bath that ensures even baking and prevents cracking.
Bake for 60-70 minutes until the edges are set and the center still jiggles slightly when shaken gently. The top should be golden brown with a slight crackle pattern—this indicates proper doneness. Rotate the pan halfway through baking for even heat distribution. Remove from the water bath and let cool in the oven with the door slightly ajar for 15 minutes to prevent condensation.
Chill and Serve for Optimal Texture
Carefully remove the cheesecake from the springform pan and transfer it to a wire rack. Let it cool completely at room temperature for 1 hour, then refrigerate uncovered for at least 6 hours (preferably overnight). This gradual cooling process allows the cheesecake to set properly without developing cracks.
Before serving, run a thin knife around the edges to loosen if needed. The cheesecake should be firm with clean slices that hold their shape. Dust with an additional 1-2 tablespoons powdered sugar if desired, and serve chilled. Each slice should reveal the beautiful vanilla swirls throughout the creamy filling, with a perfectly crisp crust at every bite.
Pro Tips For Making Philadelphia Cream Cheese Baked Cheesecake
- SOFTEN CREAM CHEESE FIRST: I learned this the hard way—trying to mix cold cream cheese blocks straight from the fridge into the batter. Use the microwave for 10-15 seconds per block (cover with a damp paper towel) until just pliable, not melted. This ensures a smooth batter that won’t turn grainy, and your texture will be silky instead of streaky.
- WHISK EGGS ROOM TEMP: Crack those eggs into a separate bowl first, then let them sit out for 10 minutes before whisking. Cold eggs can curdle the cream cheese mixture, and I’ve seen enough failed batches where someone skipped this. Warm eggs blend better and keep the filling stable during baking.
- DON’T OVERMIX THE BATTER: Once you’ve incorporated all the ingredients, give it one gentle fold with a spatula—just enough to combine. Overmixing introduces too much air, which causes cracks. I used to think more mixing = better texture, but now I know less is more for a smooth, crack-free top.
- USE A WATER BATH—NO EXCUSES: This isn’t optional. Wrap your springform pan in foil first, then place it in a deep roasting pan filled with hot water (about halfway up the pan). The steady heat prevents a domed top and ensures even baking. I’ve had cheesecakes collapse mid-bake because someone skipped this—don’t be that person.
Common mistakes when making this recipe
Overmixing the Batter
I’ve seen many beginners overmix the cheesecake batter, which introduces too much air and causes the filling to sink or develop cracks. Once the Philadelphia cream cheese and sugar are fully combined, mix the eggs in just until incorporated—no need for vigorous blending.
Overmixing also risks breaking the egg yolks, leading to a grainy texture. Use a spatula to gently fold in the sour cream and cornstarch instead of mixing vigorously. 💡
Skipping Room Temperature Prep
Using cold cream cheese or eggs is a surefire way to end up with lumps or a dense, grainy texture. Always let your 32 oz Philadelphia cream cheese and 4 large eggs sit at room temperature for at least 1 hour before mixing.
I place them in warm water for 10 minutes if I’m in a hurry, but never skip this step—it’s the difference between a silky cheesecake and a sad, lumpy mess.
Incorrect Water Bath Setup
The water bath is non-negotiable for preventing cracks, but many people don’t seal the springform pan properly. Wrap the pan tightly with heavy-duty aluminum foil, sealing the edges completely so water can’t seep in.
I also recommend using a deep roasting pan and adding water only halfway up the sides of the springform—this creates the perfect steam environment. If water gets inside, your crust will turn soggy, and the filling may not set correctly. ❄️
Overbaking or Underbaking
Cheesecake is done when the edges are set but the center still jiggles slightly—this ensures a creamy texture. Overbaking dries it out, while underbaking leaves it too soft. I pull mine from the oven at 60-70 minutes when the edges look firm but the center has a gentle wobble.
If unsure, let it cool for 10 minutes before checking—it’ll continue setting as it rests.
Rushing the Cooling Process
Many people can’t resist slicing into their cheesecake right after baking, but this is a recipe for disaster. The cheesecake needs to cool gradually to prevent cracks and ensure proper setting.
After baking, let it cool in the oven for 15 minutes with the door slightly ajar, then transfer to a wire rack to cool completely at room temperature for 1 hour before refrigerating. Patience here is key—skipping this step often leads to a collapsed or cracked top.
Ignoring the Springform Pan
Using the wrong pan is a common mistake. A 9-inch springform pan is essential for even baking and easy release. If you don’t have one, a deep pie dish can work, but it won’t release as cleanly.
Always grease the pan thoroughly and line the bottom with parchment paper for easy removal. I also recommend chilling the pan in the freezer for 10 minutes before pressing the crust—this helps it hold its shape better when the filling goes in. 💪
Nutrition facts
Frequently asked questions
Why does this recipe use a water bath?
The water bath creates gentle steam that prevents cracks while ensuring even baking. Without it, the outer edges set too quickly, causing the center to pull away and form unsightly cracks. This method guarantees a silky texture throughout, even when using high-fat cream cheese.
Can I make this cheesecake without a springform pan?
Yes, but with limitations. Use a deep pie dish or cake pan, but grease it thoroughly and line the bottom with parchment paper. The edges may brown faster, so tent with foil after 45 minutes of baking. Expect slightly more crust sticking to the pan compared to a springform.
How do I fix a cracked cheesecake top?
Don't panic! Cracks are common but don't affect taste. For presentation, cover with whipped cream, chocolate ganache, or fresh berries. If you want to hide them, spread a thin layer of jam or fruit compote over the top before serving. The filling remains perfectly creamy underneath.
What's the best way to store leftovers?
Wrap tightly in plastic wrap and refrigerate for up to 5 days. For longer storage, freeze individual slices in airtight containers for 3 months. Thaw overnight in the fridge—never at room temperature. The texture remains creamy when properly stored, and the crust stays crisp.
Can I substitute vanilla extract for vanilla bean paste?
Yes, but with adjustments. Use 1 tsp vanilla extract plus seeds from 1 vanilla bean for equivalent flavor. For a stronger vanilla taste, add an extra ½ tsp extract. The paste creates more pronounced swirls, but extract works perfectly—just scrape the seeds from a pod for extra intensity.