Desserts
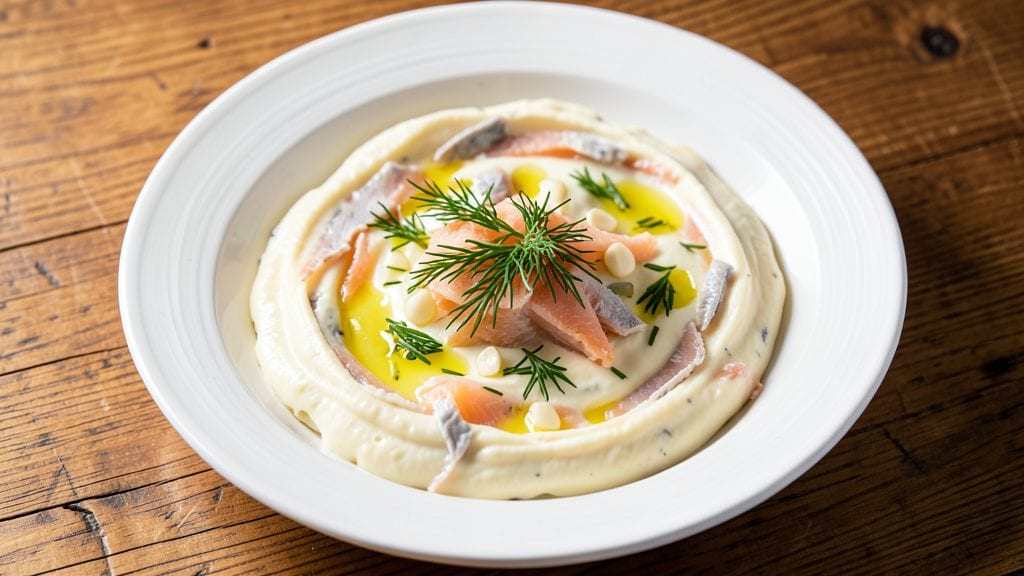
This canned salmon cream cheese recipe turns humble ingredients into a golden, irresistibly savory dip you’ll reach for again and again. This recipe delivers rich, creamy texture with a satisfying crunch that turns basic ingredients into something restaurant-worthy.
The secret lies in balancing the salmon’s natural oils with the tang of cream cheese, then topping it with a golden, crispy breadcrumb layer that adds texture and depth.
What makes this dish special is how effortlessly it comes together—just 15 minutes of prep work followed by 10 minutes in the oven.
The combination of canned salmon, cream cheese, and a touch of lemon creates a flavor profile that’s bright yet creamy, while the breadcrumb topping adds a satisfying crunch that keeps every bite interesting. It’s the kind of recipe that feels indulgent but is actually simple enough for a weeknight dinner.
The result is a crispy, golden-topped dip that’s perfect for serving with crackers, sliced baguette, or fresh vegetables. The creamy salmon mixture stays rich and flavorful, while the breadcrumb topping delivers that satisfying crunch with every bite.
This dish is ideal for parties, game day, or even a cozy night in with a side of greens or crusty bread.
Once you try this recipe, you’ll find yourself reaching for canned salmon more often—it’s versatile, budget-friendly, and packed with flavor. The best part? It’s a dish that feels special without requiring any advanced techniques. Let’s get started on creating this savory, crispy-topped masterpiece.
Ingredients for canned salmon cream cheese
Just twelve ingredients transform canned salmon and cream cheese into a restaurant-worthy crispy-topped dip.
| Ingredient | Amount | Notes |
|---|---|---|
| Canned Salmon (with bones) 🐟 | 2 cans | High-quality, drained thoroughly |
| Cream Cheese (full-fat) 🧈 | 8 oz | Room temperature for blending |
| Mayonnaise (preferably homemade) 🥫 | ¼ cup | Adds richness and moisture |
| Lemon Juice (freshly squeezed) 🍋 | 2 tbsp | Brightens the creamy base |
| Fresh Dill (chopped) 🌿 | ¼ cup | Or 1 tbsp dried dill |
| Garlic Cloves (minced) 🧄 | 2 cloves | Freshly minced for aroma |
| Panko Breadcrumbs 🍞 | ½ cup | For optimal crispiness |
| Grated Parmesan Cheese 🧀 | ¼ cup | Freshly grated preferred |
| Extra-Virgin Olive Oil 🫒 | 2 tbsp | For crispy topping |
| Diamond Crystal Kosher Salt 🧂 | ½ tsp | Adjust to taste |
| Ground Black Pepper 🌶️ | ¼ tsp | Freshly ground preferred |
| Fresh Chives (chopped) 🌱 | 2 tbsp | For garnish and freshness |
The canned salmon you choose makes all the difference. Opt for high-quality brands like Wild Planet or Vital Choice, which retain more natural oils and flavor. The bones add body to the dip, so avoid boneless varieties. Drain the salmon thoroughly to prevent excess moisture in your mixture. For an even richer texture, Starkist or StarKist work well if you're on a budget, but they lack the depth of premium brands. Always check the expiration date—freshness is critical for that bright, clean flavor. Store unopened cans in a cool, dark pantry for up to 3 years, though I recommend using them within 12 months for optimal quality.
No fresh dill? Dried dill at one-third the amount works in a pinch, though the flavor will be subtler. Substituting mayonnaise? Greek yogurt adds tanginess but may alter the texture slightly. For a lighter option, blend in 1 tbsp sour cream with the cream cheese. The breadcrumbs are non-negotiable for that signature crunch—panko stays crispy while regular breadcrumbs turn soggy. Need a gluten-free option? Crushed gluten-free crackers or almond flour deliver similar texture. Fresh herbs like chives or parsley can replace dill entirely if you're out, though they offer a different aromatic profile. Always measure your kosher salt carefully—it's coarser and more flavorful than table salt, so use half the amount if substituting.
This dip keeps beautifully in the fridge for 5 days when stored in an airtight container. For longer storage, freeze portions for up to 3 months—thaw overnight in the refrigerator before serving. The crispy topping loses its crunch when reheated, so serve this dip at room temperature for the best texture. To reheat the base mixture without the topping, warm gently in the microwave for 30 seconds and stir until creamy. For serving, arrange on a platter with crackers, sliced baguette, or fresh vegetables—the contrast of textures makes every bite satisfying. Leftovers make excellent lunches when portioned into small containers.
Why You'll Love This Recipe
- Five-Ingredient Magic: I swear by this combo—just mash the salmon, fold in cream cheese, and stir in mayo, lemon, and dill. That’s it. No fancy techniques, no waiting for anything to cook through.
- Lemon-Dill Zing: The bright lemon cuts through the richness, while fresh dill makes it taste like a fancy appetizer. Honestly, the first bite feels like a hug—creamy, tangy, and just salty enough.
- Lunchbox Hero: Spread it on crackers for a quick snack, mix into a salad for protein, or slather it on toast with everything bagel seasoning. My kids eat it straight from the jar—yes, even on a Tuesday night.
- Budget Powerhouse: Canned salmon and cream cheese stretch this recipe further than you’d think. I’ve made it last four days in the fridge, and it’s still the star of my sandwiches. (Between us, it’s my secret for cheap gourmet lunches.)
Step-by-step instructions for canned salmon cream cheese dip
This method delivers a perfectly balanced dip with a golden, shatteringly crisp topping every time.
Prepare the Cream Cheese Base
In a medium mixing bowl, combine the 8 oz cream cheese (full-fat) and 0.25 cup mayonnaise (preferably homemade). Use a hand mixer or stand mixer fitted with the paddle attachment to beat on medium speed for 2-3 minutes until completely smooth and homogeneous. The mixture should be light and airy, with no visible lumps.
Add the 2 tbsp lemon juice (freshly squeezed) and mix for an additional 30 seconds to incorporate fully. This acidity brightens the rich cream cheese and prevents the dip from becoming overly heavy. Taste at this stage—the lemon should cut through the richness, creating a balanced foundation for the remaining flavors.
Incorporate the Salmon and Aromatics
Drain the 2 cans canned salmon (with bones) thoroughly, pressing between paper towels to remove excess moisture. This step is critical—any residual water will dilute your dip and prevent the crispy topping from forming properly. Finely flake the salmon with your fingers or a fork, removing any large bones.
Add the flaked salmon to the cream cheese mixture along with the 0.25 cup fresh dill (chopped) and 2 cloves garlic cloves (minced). Gently fold everything together using a rubber spatula until evenly distributed. The mixture should hold its shape when spooned but remain smooth. Avoid overmixing, which can break down the salmon's texture and make the dip grainy.
Season and Assemble for Baking
In a small bowl, combine the 0.5 cup panko breadcrumbs, 0.25 cup grated parmesan cheese, 0.5 tsp diamond crystal kosher salt, and 0.25 tsp ground black pepper. Drizzle in the 2 tbsp extra-virgin olive oil and toss with a fork until the breadcrumbs are evenly moistened and cling together. This topping mixture should resemble coarse, wet sand when pressed.
Transfer the salmon mixture to a greased 8x8-inch baking dish and spread it into an even layer, about ½-inch thick. The surface should be smooth but not compacted. Sprinkle the prepared topping mixture evenly over the dip, pressing down very lightly with the back of a spoon to ensure good contact. This creates the optimal surface area for maximum crispiness.
Bake Until Golden and Crisp
Preheat your oven to 375°F and bake the dip for 18-20 minutes until the topping is deep golden brown and the edges begin to pull away slightly from the dish. The center should still feel slightly soft to the touch—this indicates the dip is fully heated through but hasn't begun to dry out.
Here's the professional trick: For the last 2 minutes of baking, increase the oven temperature to broil (watch closely to prevent burning). This final burst of heat intensifies the browning and creates that coveted crispy texture. The dip should be hot throughout when removed, with a firm, crackly topping that shatters when broken.
Rest and Garnish
Remove the baking dish from the oven and let the dip rest for 5-10 minutes before serving. This resting period allows the internal temperature to stabilize and the flavors to meld completely. The topping will firm up slightly as it cools, maintaining its crisp texture while the dip below remains creamy.
Garnish with the 2 tbsp fresh chives (chopped) just before serving. These add a fresh, bright contrast to the rich salmon mixture and a pop of color that makes the dish visually appealing. Serve immediately with assorted crackers, sliced baguette, or fresh vegetable sticks for dipping. The contrast between the cool, creamy dip and the crispy topping creates an irresistible textural experience.
Pro Tips For Making Canned Salmon Cream Cheese
- Mash the Bones First: DESCRIPTION:
- Soften Cream Cheese Fast: DESCRIPTION:
- Strain the Lemon Juice: DESCRIPTION:
- Fold, Don’t Stir: DESCRIPTION:
Essential equipment for this recipe
Essential Mixing Tools
Start with a hand mixer or stand mixer fitted with the paddle attachment—this ensures your cream cheese and mayo blend into a silky, lump-free base. I recommend the KitchenAid KSM150PS for its durability and consistent performance.
For smaller batches, a hand mixer like the Cuisinart HM-90BCN works perfectly. Avoid wooden spoons or forks—they won’t incorporate air effectively, leaving your dip dense. 💪
Baking Dish Choice
An 8x8-inch baking dish is ideal for even heat distribution and crispy edges. I prefer glass Pyrex dishes because they conduct heat evenly and prevent sticking. For non-stick performance, use a ceramic-coated dish like the Wilton Ceramic Square Baking Pan.
Grease your dish thoroughly with extra-virgin olive oil or line it with parchment paper to ensure easy release after baking.
Crispy Topping Tools
For the perfect breadcrumb topping, use a small mixing bowl and a fork to toss the panko with olive oil and seasonings. A spoon or rubber spatula helps press the topping lightly onto the dip, creating that signature crackly texture.
For extra crispiness, I recommend toasting the panko in a dry skillet over medium heat for 2-3 minutes before mixing with other toppings. This removes excess moisture and intensifies the flavor. 🔥
Temperature Control
An oven thermometer is a game-changer for consistent results. My Thermoworks Oven Thermometer ensures your oven hits 375°F accurately—many home ovens run hot or cold. For the broil step, position the rack in the middle position to avoid burning the topping.
If your oven lacks a broiler, a countertop toaster oven like the Cosori Premium delivers precise, even broiling for that perfect golden finish.
Garnishing Essentials
Fresh chives or parsley elevate the dish visually and add a bright finish. Use a sharp chef’s knife and cutting board to finely chop them. For presentation, I like arranging the dip on a wooden serving board or slate platter—it contrasts beautifully with the golden topping.
A small offset spatula helps transfer the dip neatly to your serving dish without disturbing the crispy crust. ✨
Storage Containers
For leftovers, transfer the dip (without the crispy topping) to an airtight container like the Glasslock 8x8-inch container. Store it in the refrigerator for up to 5 days—the flavors deepen over time! To reheat, warm gently in the microwave for 30 seconds, then stir until creamy.
For freezing, portion the dip into single-serving containers and freeze for up to 3 months. Thaw overnight in the fridge before serving. ❄️
Nutrition facts
Frequently asked questions
Can I make this dip without baking it?
Yes! For a no-bake version, simply mix all ingredients together and chill for 2 hours to let flavors meld. Skip the breadcrumb topping or sprinkle crushed nuts for crunch. The texture will be creamier but equally delicious with crackers or veggies.
What's the best way to store leftovers?
Store the dip (without crispy topping) in an airtight container in the fridge for 5 days. For freezing, portion into single servings and freeze for up to 3 months. Reheat gently in the microwave for 30 seconds, stirring until smooth. The topping won't crisp up again when reheated.
Can I use smoked salmon instead of canned?
Smoked salmon adds a deeper, smoky flavor. Use 6 oz smoked salmon (drained) instead of canned, and reduce the cream cheese to 6 oz to balance moisture. Add 1 tsp smoked paprika to complement the flavor profile. The texture will be slightly firmer but equally rich.
Why did my topping turn out soggy?
Soggy topping usually means excess moisture. Double-check that you drained the canned salmon thoroughly and patted it dry. Also, ensure your panko is fresh and toasted lightly before mixing with oil. For extra insurance, bake at 375°F for 15 minutes before broiling to evaporate any remaining moisture.
What are the best dippers for this recipe?
Classic choices include water crackers, baguette slices, or endive leaves. For extra flair, try pretzel crisps, gluten-free crackers, or cucumber rounds. The contrast between the cool dip and warm, crispy topping works best with room-temperature dippers.