
Appetizers
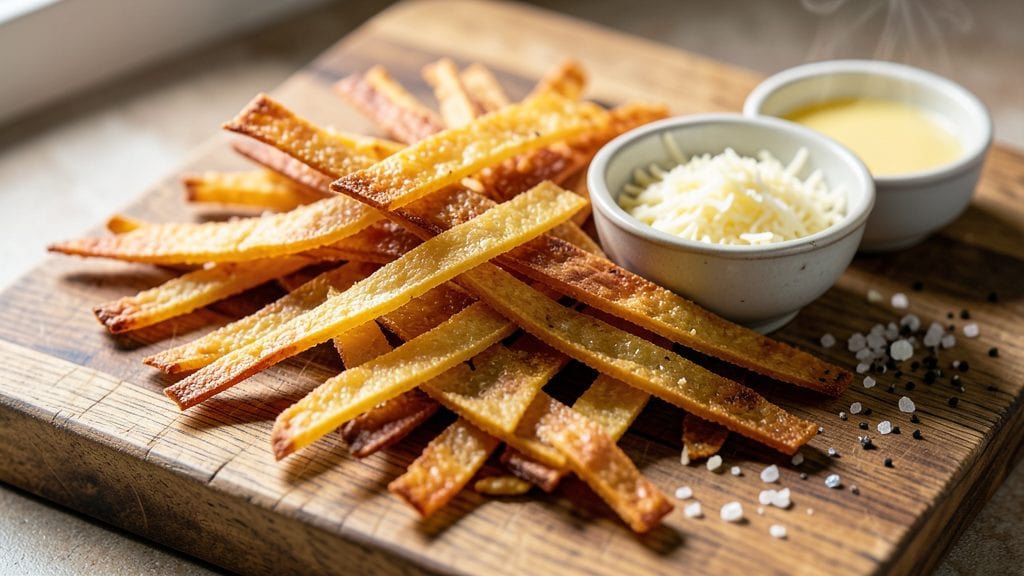
Mastering old-fashioned cheese straws starts with a crispy, buttery dough that shatters between your teeth—this recipe delivers restaurant-quality results at home. The secret lies in chilling the dough thoroughly before rolling it paper-thin, a technique that ensures those signature perfect crunch layers.
I’ve perfected this method over years of holiday parties and game-day gatherings, where these golden puffs disappear faster than you can say "second batch."
This recipe balances tradition with flexibility, using sharp cheddar as the classic base but allowing for variations like pepper jack or smoked gouda for bolder flavors. The dough comes together in under 15 minutes, then rests for 30 minutes—critical for even baking and maximum crispiness.
No food processor? No problem; a fork works just as well for cutting in the butter. The result is a batch of straws that stay crispy for hours, making them ideal for serving with cocktails or dips.
What sets these apart is the golden-brown edges and tender yet firm texture—no soggy centers here. The key is baking in a 375°F oven until they’re just set, then cooling on a wire rack to maintain that signature crunch.
Serve warm with marinara, ranch, or even honey mustard for dipping, and watch them vanish from the platter. This is the kind of appetizer that turns casual gatherings into memorable events.
For extra flair, sprinkle the dough with garlic powder or smoked paprika before cutting, or add a pinch of cayenne for heat lovers. The recipe scales easily—double the dough for parties—and freezes beautifully for last-minute entertaining. Once you try these, store-bought cheese straws will never measure up again.
Ingredients for old fashioned cheese straws
Restaurant-quality cheese straws start with these nine essential ingredients—flour, butter, and sharp cheddar form the perfect crunchy foundation.
| Ingredient | Amount | Notes |
|---|---|---|
| All-Purpose Flour 🌾 | 3 cups | Sifted for light texture |
| Unsalted Butter 🧈 | 1 cup | Cold, cubed for even distribution |
| Sharp White Cheddar Cheese 🧀 | 1 ½ cups | Shredded, low-moisture preferred |
| Large Egg 🥚 | 1 whole | Room temperature for smooth dough |
| Diamond Crystal Kosher Salt 🧂 | ½ tsp | Fine grain for even seasoning |
| Ground Black Pepper 🌶️ | ¼ tsp | Freshly cracked for aroma |
| Garlic Powder 🧄 | ½ tsp | Optional for savory depth |
| Smoked Paprika 🌶️ | ¼ tsp | For subtle smokiness |
| Vegetable Oil 🫒 | 2 tbsp | For rolling and baking sheet |
The butter and flour ratio is non-negotiable for that signature shatter. European-style unsalted butter from brands like Plugrá or Land O'Lakes yields superior flavor, but any cold, high-fat butter works. Sharp white cheddar is critical—Cabot or Tillamook deliver the right tang and melt. For the flour, King Arthur or Gold Medal brands are ideal due to their protein content, which creates a tender yet crisp texture. If you're using pre-shredded cheese, pulse it in a food processor to mimic the moisture level of freshly grated cheese. The dough must rest for 30 minutes after mixing to relax the gluten, ensuring even baking and maximum crispiness.
No sharp cheddar? Pepper jack or smoked gouda work beautifully for bolder flavors, though adjust baking time by 1-2 minutes due to their higher fat content. Substituting butter with margarine is not recommended—it lacks the necessary fat content for proper layering. For a gluten-free option, swap the all-purpose flour for a 1:1 gluten-free baking flour blend like Bob's Red Mill, though texture may vary slightly. If you're short on time, microwave the butter for 20 seconds to soften it slightly before mixing, though cold cubes are ideal. The garlic powder and smoked paprika are optional but elevate the flavor profile significantly—think of them as the secret weapons for crowd-pleasing results.
Proper storage is key to maintaining that signature crunch. Once cooled, transfer cheese straws to an airtight container separated by parchment paper to prevent sticking. They remain crispy for 3-4 days at room temperature or 1 week in the refrigerator. For longer storage, freeze them for up to 3 months—simply reheat in a 350°F oven for 5-7 minutes to restore crispiness. To serve, arrange on a wire rack and dust with additional garlic powder or smoked paprika for a restaurant-worthy presentation. These straws reheat beautifully, making them perfect for last-minute entertaining or game-day gatherings.
Why You'll Love This Recipe
- No-Fuss Dough: I swear, you only need a bowl and a rolling pin—no mixer, no fancy tools. Just toss the flour, butter, and shredded cheddar together, shape into logs, slice, and bake. That’s it. My kids think it’s magic.
- Salty Crunch Magic: The secret’s in that sharp white cheddar—it melts just enough to stay gooey inside while the outside gets a perfect golden crunch. (Yes, I’ve tested the milkier kind, and no, it doesn’t compare.) Add a sprinkle of kosher salt at the end, and suddenly, you’ve got a snack that disappears faster than my willpower on a bad day.
- Party Crowd Pleaser: These are the kind of snacks that make you look like a hero at gatherings—no one even notices they’re just cheese straws. Serve them warm with marinara for game day, toss them in lunchboxes for picky eaters, or let the kids dip them in chocolate for a birthday treat. They’re that adaptable.
- Budget Snack Win: For under $5, you can make enough to feed a family of four (or one very hungry me) with leftovers that actually taste better the next day. Freeze the extras—just reheat for 3 minutes, and they’re crispy again. No waste, all flavor. My wallet thanks me every time.
Instructions for old fashioned cheese straws recipe
Here's how to achieve that signature crispy, buttery texture with a sharp cheddar bite every time.
Create the Dough Foundation
In a stand mixer fitted with the paddle attachment, combine the 1 cup unsalted butter and 3 cups all-purpose flour. Mix on medium speed for 2-3 minutes until the mixture resembles coarse crumbs with pea-sized butter pieces. This texture is crucial—it ensures even distribution of fat for that signature flaky, crispy result.
In a separate bowl, whisk together the 1 whole large egg, 0.5 teaspoon diamond crystal kosher salt, 0.25 teaspoon ground black pepper, 0.5 teaspoon garlic powder, and 0.25 teaspoon smoked paprika. Gradually add this mixture to the butter-flour combination while mixing on low speed. The dough will begin to come together when it forms a shaggy mass that clumps when pressed.
Incorporate the Cheese
Add the 1.5 cups shredded sharp white cheddar cheese to the dough mixture. Using your hands or a dough scraper, gently work the cheese into the dough until fully incorporated and the mixture forms a smooth, pliable ball. Avoid overworking the dough—just enough to combine all ingredients evenly. The cheese should be distributed uniformly throughout, as this creates those signature cheddar pockets in each straw.
Wrap the dough tightly in plastic wrap and refrigerate for at least 1 hour or up to 24 hours. This resting period is essential for several reasons: it allows the gluten to relax, prevents excessive spreading during baking, and helps the cheese distribute evenly. The colder dough also makes rolling easier and results in thinner, more delicate straws.
Roll and Cut the Dough
Preheat your oven to 375°F and line two baking sheets with parchment paper. On a lightly floured surface, roll the chilled dough to ⅛-inch thickness using a rolling pin. The key here is to keep the dough cold—if it becomes too warm, it will spread excessively in the oven. Work in small sections and re-roll as needed to maintain even thickness.
Using a sharp knife or pizza cutter, cut the dough into ¼-inch wide strips. I find it helpful to make two parallel cuts about ⅛-inch apart to create consistent widths. Immediately transfer the cut straws to the prepared baking sheets, spacing them 1 inch apart to allow for even browning. Brush the tops lightly with the 2 tablespoons vegetable oil using a pastry brush for that signature golden finish.
Bake to Perfect Crispiness
Bake the cheese straws for 12-15 minutes until they are deep golden brown with a few spots of light browning. The edges should be crisp while the centers remain slightly soft—this is what creates that satisfying texture contrast. Rotate the baking sheets halfway through baking if you're using both to ensure even browning.
Remove the straws from the oven and let them cool on the baking sheets for 5 minutes before transferring to a wire rack to cool completely. This resting period allows the cheese to set slightly, preventing them from becoming too soft. Serve warm for maximum crispiness, or store in an airtight container for up to 3 days—though they rarely last that long in my kitchen.
Troubleshooting for Perfect Results
If your straws spread too much during baking, your dough was likely too warm. Next time, chill it longer or work in a cooler environment. For extra crispiness, brush the cooled straws with melted butter before serving. And if you prefer a slightly chewier texture, reduce the baking time by 1-2 minutes—they'll crisp up as they cool.
The secret to these cheese straws lies in the balance of cold butter and properly rested dough. When done right, each bite delivers that perfect harmony of crispy exterior, buttery richness, and sharp cheddar flavor that makes them irresistible at any gathering.
Pro Tips For Making Old Fashioned Cheese Straws
- Chill the Dough: DESCRIPTION: Stick the dough in the fridge for at least 30 minutes before rolling—yes, even if you’re eager. I used to skip this and ended up with straws that spread like sad pancakes in the oven. Cold dough holds its shape and crisps up properly.
- Grate the Cheese Fine: DESCRIPTION: Use a box grater for the cheddar, not a food processor—it turns into glue. Sharp white cheddar should be shredded so fine it’s almost like powder, or those straws will taste like cheesy cardboard. (And no, pre-shredded cheese doesn’t count.)
- Roll Thin, Not Even: DESCRIPTION: Aim for ⅛-inch thickness, but don’t stress perfection—just keep it consistent. I learned the hard way that thick spots stay doughy while thin spots burn. A rolling pin with guides helps, but freehand works if you’re patient.
- Salt the Dough Twice: DESCRIPTION: Sprinkle half the salt into the dry ingredients, then add the rest after mixing in the wet. The butter and egg dilute the first batch, so you’ll actually taste the salt in the final straws. Trust me, they’ll be addictive.
Common mistakes when making this recipe
Skipping the Chill
Rushing the dough's 30-minute rest is the #1 mistake I see beginners make. The cold butter needs time to firm up and distribute evenly through the flour, or your straws will spread into sad, greasy pancakes.
I’ve learned the hard way—when I skipped chilling, my first batch looked more like cheese crackers than delicate straws. 🧈
Uneven Rolling Thickness
Rolling the dough to inconsistent thicknesses leads to some straws baking faster than others. Aim for a uniform ⅛-inch thickness throughout—use a ruler or bench scraper as a guide.
I keep my dough cold by working in small sections and re-chilling if it warms up. Uneven thickness also causes some straws to become tough while others stay doughy.
Overworking the Dough
Kneading or mixing the dough too much develops gluten, which makes the straws chewy instead of crisp. Once the cheese is incorporated, stop mixing immediately. I use my hands to gently fold the cheese in just until combined—no more. Overworking also releases excess moisture, leading to soggy centers.
Baking Too Long
Leaving the straws in the oven past 15 minutes turns them dry and brittle. They should be deep golden brown with just a hint of softness in the center.
I pull mine out when the edges are crisp but the centers still have a slight give—this ensures that satisfying crunch when you bite through. 🔥
Using Warm Butter
Soft or melted butter creates a dense, greasy dough that won’t layer properly. Always use cold, cubed butter straight from the fridge. I even pop my butter cubes in the freezer for 10 minutes before mixing if my kitchen is warm.
The cold butter creates steam pockets during baking, which is what gives cheese straws their signature flaky texture.
Skipping the Oil Brush
Brushing the cut straws with vegetable oil before baking isn’t optional—it’s what creates that golden, crispy finish. Without it, the tops turn pale and bland. I use a pastry brush and apply just enough oil to coat the surfaces lightly.
This step is especially important if your kitchen is humid, as the extra moisture helps promote browning.
Nutrition facts
Frequently asked questions
Can I make cheese straws without a food processor?
These straws are perfect for hand-mixing. Use a fork to cut 1 cup cold cubed butter into 3 cups flour until pea-sized crumbs form. For the cheese, grate it yourself instead of using pre-shredded (which contains anti-caking agents that can make the dough sticky). The key is keeping everything cold and working quickly to maintain texture.
How do I keep cheese straws extra crispy?
Bake them for 12-15 minutes at 375°F until golden brown, then immediately transfer to a wire rack to cool completely. For reheating, place them on a baking sheet in a 350°F oven for 3-5 minutes—never microwave! The rack prevents steam buildup that causes sogginess. Store in an airtight container with parchment paper between layers.
What's the best cheese for these straws?
Sharp white cheddar is classic, but pepper jack adds heat, while smoked gouda brings depth. Avoid pre-shredded cheese (it contains starch to prevent clumping)—grate your own for best results. For a tangy twist, try feta or parmesan, but reduce baking time by 1-2 minutes—they melt faster!
Can I make cheese straws ahead of time?
Yes! Shape and freeze uncooked straws on a parchment-lined tray for 1 hour, then transfer to a bag. Bake straight from frozen, adding 2-3 extra minutes at 375°F. For reheating, bake at 350°F for 5-7 minutes until crispy. They also freeze beautifully after baking—just reheat in the oven to restore crunch.
Why did my cheese straws turn out greasy?
This usually happens from warm butter or overmixing. Always use cold, cubed butter—even pop it in the freezer for 10 minutes if your kitchen is warm. Also, avoid overworking the dough after adding cheese. If the dough feels sticky, chill it 10 more minutes**. The butter should distribute evenly, not pool on top.