
Salads
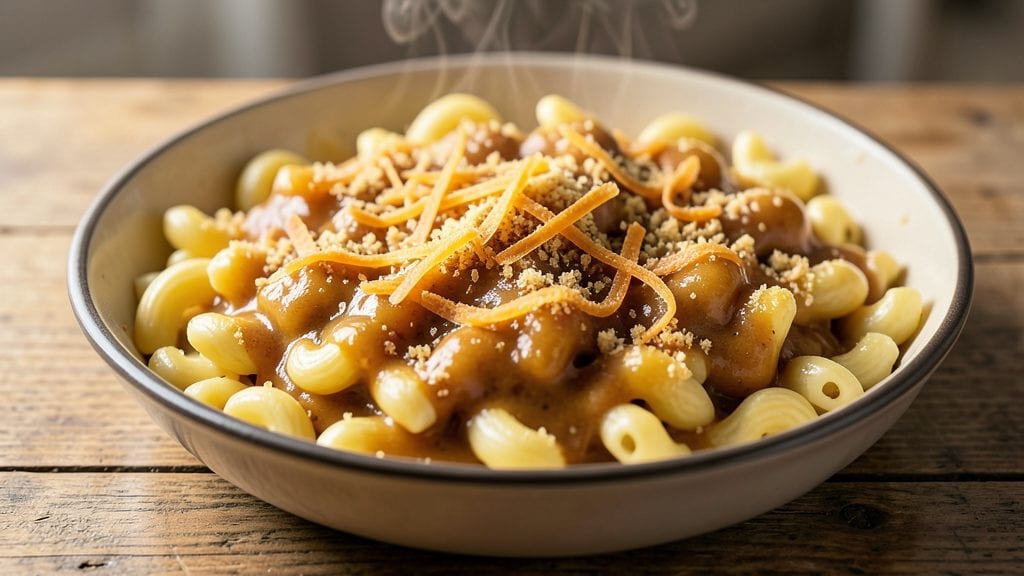
This no-boil macaroni and cheese recipe transforms weeknight dinners with its creamy one-pot magic—no pasta straining, no cheese lumps, just velvety perfection in 15 minutes. The secret lies in cooking the pasta directly in the cheese sauce, where starchy water becomes the sauce’s secret weapon.
I perfected this method after years of burning through traditional recipes, and it never fails to deliver restaurant-quality results without the fuss.
What makes this recipe truly foolproof is the one-pot technique, which eliminates cleanup while ensuring the pasta absorbs the rich, cheesy sauce perfectly. You’ll start with a simple roux—just butter and flour—to create a smooth base before adding milk and cheese.
The result? A sauce so creamy and cohesive that it clings to every strand of pasta, leaving no dry spots behind.
By the time you’re done, you’ll have a golden, bubbling pot of macaroni and cheese with tender pasta and a sauce so velvety it melts in your mouth. The best part?
No boiling water, no waiting for pasta to drain—just 15 minutes of hands-off cooking. This dish is perfect for busy weeknights, picky eaters, or anyone craving comfort food without the effort.
Customize it with optional add-ins like crispy bacon, steamed broccoli, or a sprinkle of paprika for extra depth. The possibilities are endless, but the one-pot method remains the game-changer. Let’s get cooking!
Ingredients for no boil macaroni and cheese
Twelve ingredients deliver restaurant-quality macaroni and cheese without the fuss or lumps.
| Ingredient | Amount | Notes |
|---|---|---|
| Elbow Macaroni 🍝 | 8 oz | Dry, medium or small shape |
| Unsalted Butter 🧈 | ½ cup | Cold, cut into small cubes |
| All-Purpose Flour 🌾 | ¼ cup | Sifted for smooth roux |
| Whole Milk 🥛 | 2 cups | Room temperature preferred |
| Shredded Sharp Cheddar Cheese 🧀 | 2 cups | Freshly grated from block |
| Diamond Crystal Kosher Salt 🧂 | ¾ tsp | Adjust to taste |
| Ground Black Pepper 🌶️ | ¼ tsp | Freshly cracked preferred |
| Heavy Cream 🥛 | ¼ cup | For ultra-creamy texture |
| Optional Crispy Bacon 🥓 | 4 oz | Cooked and crumbled |
| Steamed Broccoli Florets 🥦 | 1 cup | Cut into bite-sized pieces |
| Smoked Paprika 🌶️ | ¼ tsp | For subtle smoky depth |
| Fresh Parsley 🌿 | ⅛ cup | Chopped for garnish |
The sharp cheddar is non-negotiable—pre-shredded contains anti-caking agents that prevent proper melting. Kraft or Cabot blocks are ideal; grate them yourself for maximum creaminess. For the pasta, Barilla or De Cecco elbow macaroni cooks evenly in the sauce. The unsalted butter must be cold to prevent the roux from breaking, so pull it straight from the fridge. Diamond Crystal kosher salt is preferred for its clean, bright flavor, but any kosher salt will work. The heavy cream adds luxurious texture, but whole milk alone delivers satisfying results. For the optional add-ins, Trader Joe's crispy bacon or freshly steamed broccoli elevate the dish without overpowering the cheese sauce.
No sharp cheddar? Monterey Jack or Gruyère work beautifully, though the flavor profile shifts. Substitute heavy cream with an extra 0.25 cup whole milk if needed, though the sauce will be slightly lighter. Pre-shredded cheese? Pulse it in a food processor to break up anti-caking agents, then drain excess starch. For the smoked paprika, substitute regular paprika at double the amount if unavailable. The bacon can be swapped for crispy hash browns or diced ham, while broccoli can be replaced with peas or corn. Fresh parsley is ideal, but dried parsley at one-third the amount suffices in a pinch. The flour must be sifted to avoid lumps in the roux—this is the one step where precision matters most.
This dish reheats beautifully—simply cover with a splash of milk and warm through on the stovetop. Keeps for 4-5 days in the fridge, though the texture suffers after day three. For longer storage, portion into airtight containers and freeze for up to 3 months. The sauce thickens as it cools, so a few extra splashes of milk may be needed when reheating. Garnish with parsley and paprika just before serving to maintain vibrant color. Leftovers transform into perfect mac and cheese sandwiches the next day—use toasted sourdough for the best texture.
Why You'll Love This Recipe
- Two-Ingredient Sauce: I swear by the butter-flour-milk roux—it’s velvety, rich, and takes zero effort. Just melt butter, whisk in flour, then pour in milk until it’s thick enough to coat the back of a spoon. No measuring cups, no boiling, no stress.
- Cheddar Overload: That sharp cheddar melts into a glossy, stretchy blanket over the pasta—not watery, not bland. I double the cheese because, honestly, why not? The first bite is always the best, and the last bite is just as good.
- Lunchbox Hero: Between us, this is my go-to for school lunches or office meals. Cold or reheated, it holds up perfectly—no soggy pasta here. Pack it in a thermos, and kids (or coworkers) will actually eat it.
- Pantry Staple Magic: Butter, flour, milk, cheese—these are things I always have. No fancy ingredients, no last-minute grocery runs. And because it reheats like a dream, I make a big batch and enjoy it for days. Budget-friendly? Absolutely. Lazy-friendly? Even more so.
Step-by-step instructions for no-boil macaroni and cheese
This method delivers restaurant-quality mac and cheese without boiling pasta—just one pot and 15 minutes of hands-off cooking.
Prepare the Roux Foundation
In a large, deep skillet or Dutch oven, melt the 0.5 cup unsalted butter over medium heat until it foams but doesn't brown. Add the 0.25 cup all-purpose flour all at once and whisk vigorously for 2-3 minutes until the mixture turns a pale golden color and smells nutty. This roux forms the creamy base of your sauce—don't rush it or it'll taste raw.
Watch for the roux to thicken noticeably and coat the back of a spoon. If it darkens too quickly, reduce the heat slightly. The perfect roux should be smooth and glossy, not grainy. This is the secret to that velvety texture you crave in mac and cheese.
Gradually Add Milk for Creamy Perfection
Slowly pour in the 2 cups whole milk while whisking continuously to prevent lumps. Keep the heat at medium-low and cook for 5-7 minutes until the mixture thickens enough to coat the back of a spoon. You'll see it transform from a thin sauce to a rich, creamy consistency that clings to the pan.
If the sauce thickens too quickly, whisk in 1-2 tablespoons of milk to adjust the texture. The goal is a smooth, velvety sauce that's thick enough to coat the pasta but still pours easily. Stir in the 2 cups shredded sharp cheddar cheese, 0.75 tsp diamond crystal kosher salt, 0.25 tsp ground black pepper, and 0.25 tsp smoked paprika, stirring until the cheese melts completely and the sauce is perfectly smooth.
Cook the Pasta Directly in the Sauce
Add the 8 oz elbow macaroni to the cheese sauce and stir gently to coat each piece. The pasta will absorb the sauce and cook through as it simmers. Cover the skillet and cook on low heat for 8-10 minutes, stirring occasionally, until the pasta is tender and the sauce has thickened further.
Here's the magic: The pasta cooks in its own sauce, absorbing all that creamy goodness without losing texture. You'll know it's done when the pasta is al dente (firm to the bite) and the sauce has thickened into a luxurious coating. If the sauce gets too thick, whisk in 1-2 tablespoons of milk to restore the perfect consistency.
Finish with Cream and Optional Add-Ins
Stir in the 0.25 cup heavy cream and the 1 cup steamed broccoli florets, mixing gently to distribute evenly. If using, fold in the 4 oz optional crispy bacon for added texture and smoky depth. The cream elevates the dish to ultra-creamy perfection, while the broccoli adds a touch of freshness that balances the richness.
Taste and adjust the seasoning—you might need a pinch more salt or pepper to complement the added ingredients. Let the mac and cheese sit off the heat for 2-3 minutes to allow the flavors to meld completely. This resting period ensures every bite is perfectly balanced and creamy.
Serve Immediately with Fresh Garnish
Transfer the mac and cheese to serving bowls and garnish with 0.125 cup fresh parsley, chopped finely for a pop of color and freshness. The parsley not only looks beautiful but also adds a subtle brightness that cuts through the richness of the cheese sauce.
Serve immediately while still hot—this dish is best enjoyed straight from the pot, with that creamy sauce clinging to every strand of pasta. The no-boil method preserves the pasta's texture while infusing it with maximum flavor, delivering a result that rivals traditional recipes but with half the effort.
Pro Tips For Making No Boil Macaroni And Cheese
- Whisk Like You Mean It: This isn’t a smoothie—aggressively whisk the butter, flour, and milk until it’s thick enough to coat the back of a spoon before adding cheese. I used to half-ass this step, and the sauce always ended up grainy or clumpy. Three minutes of elbow grease now saves me from scraping cheese off the bottom later.
- Shred Cheese Like a Pro: Buy pre-shredded cheese labeled "block-style" or grate your own—those dusty pre-shredded cubes melt into a sad, oily mess. If you’re using store-bought, pulse it in a food processor for 10 seconds to break up clumps, then drain excess moisture on a towel. Trust me, your sauce will thank you.
- Don’t Rush the Simmer: Once the cheese is added, let the sauce bubble gently for 2–3 minutes—no stirring like a maniac. Overheating turns cheddar into a greasy sludge, and stirring too hard incorporates air, which makes the sauce break later. Lower the heat if it’s foaming aggressively.
- Mix Mac and Cheese Dry: Drain the pasta, toss it with 1 tablespoon of butter and a pinch of salt before adding sauce. This creates a barrier so the noodles don’t turn mushy when the hot cheese sauce hits them. (Yes, even if you’re impatient like me—this is the thing that matters most.)
Storing and reheating this recipe
Fridge Storage Secrets
Store your no-boil macaroni and cheese in an airtight container (I love Pyrex glass containers with snap-on lids) for up to 4-5 days. The sauce will thicken slightly as it cools, so add 1-2 tablespoons of milk when reheating to restore creaminess.
Let it cool completely before sealing to prevent condensation buildup, which can make the pasta soggy. 🥫
Freezer-Friendly Tips
For longer storage, portion into quart-sized freezer bags (leave 1-inch headspace for expansion) or airtight containers. This dish freezes beautifully for up to 3 months—just thaw overnight in the fridge before reheating.
The texture remains creamy, though the pasta may soften slightly after freezing. Label containers with dates to track freshness.
Stovetop Reheating
My preferred method is stovetop reheating: transfer portions to a skillet and add 2-3 tablespoons of milk to loosen the sauce. Warm over medium-low heat for 5-7 minutes, stirring frequently, until heated through (165°F internal temp).
The low heat prevents scorching while restoring that velvety texture. For extra richness, stir in 1 tablespoon of butter at the end. 🔥
Microwave Revival
For quick meals, cover a single serving with a damp paper towel and microwave on 50% power for 2-3 minutes. Stir halfway, then continue in 30-second intervals until hot (165°F).
Add 1 tablespoon of milk if the sauce seems too thick. Avoid full power to prevent a rubbery texture from uneven heating.
Garnish Refresh
Revive leftovers with fresh garnishes: sprinkle with smoked paprika and chopped parsley just before serving. These add vibrant color and brightness that cuts through any reheated richness. For extra crunch, top with toasted breadcrumbs or crispy bacon bits—they add texture that disappears in the original dish. 🌿
Portion Control
Divide into individual ramekins before freezing for perfect single-serving portions. Reheat directly in the ramekin for 3-4 minutes at 350°F—no transfer needed! This method keeps the sauce intact and makes cleanup effortless.
I use ceramic ramekins because they distribute heat evenly and prevent soggy bottoms. Perfect for meal prep! ⚡
Nutrition facts
Frequently asked questions
Why does pasta cook faster in the sauce instead of boiling?
The sauce's high moisture content and heat create a gentle cooking environment that tenderizes the pasta gradually. The starch from the roux and milk helps break down the pasta's structure more efficiently than boiling water, while the cheese adds fat that speeds up moisture penetration. This method also preserves the pasta's texture better than traditional boiling, which can make it mushy.
Can I use pre-shredded cheese in this recipe?
Pre-shredded cheese works, but it contains anti-caking agents that can prevent smooth melting. For best results, pulse pre-shredded cheese in a food processor to break up additives, then drain excess starch. Freshly grated block cheese (like sharp cheddar) always gives the creamiest, most cohesive sauce without lumps.
What's the best pasta shape for this no-boil method?
Small, medium shapes like elbow macaroni, shells, or cavatappi work perfectly—they absorb sauce well and cook evenly in 8-10 minutes. Avoid long pasta (like spaghetti) as it can get tangled in the sauce. For extra sauce cling, try star-shaped or wagon wheel pasta, which hold sauce beautifully.
How do I fix a sauce that's too thick or too thin?
For a thick sauce, whisk in 1-2 tablespoons of milk gradually until smooth. If it's too thin, simmer uncovered for 2-3 minutes to evaporate excess moisture or add 1 tablespoon of butter to stabilize it. The key is patience—never rush adjustments, or you'll risk lumps or uneven texture.
Can I make this ahead of time for a potluck?
Assemble the dish completely (except garnishes) and refrigerate for up to 24 hours. Reheat gently on the stovetop with 2-3 tablespoons of milk to restore creaminess. For potlucks, transfer to a disposable foil pan and cover with foil—it reheats beautifully in the oven at 325°F for 15-20 minutes**. Add garnishes just before serving.