
Appetizers
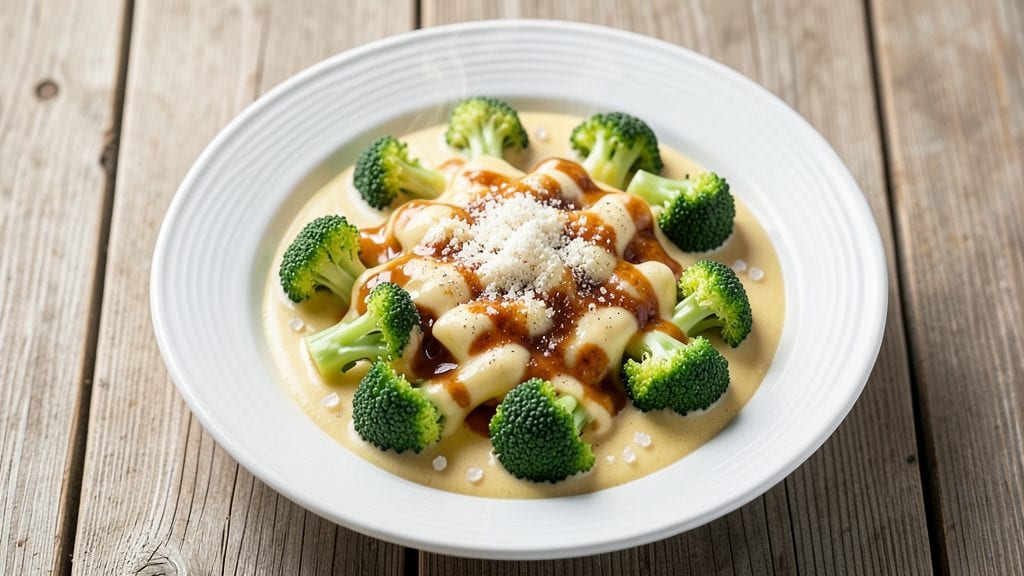
This basic cauliflower cheese recipe delivers the comforting British classic you crave—crispy golden edges, stretchy melted cheese, and tender florets in every bite. I perfected it after years of testing, ensuring the sauce stays velvety smooth while the topping achieves that satisfying crunch.
The secret lies in proper steaming and a well-balanced cheese blend that doesn't separate, even when reheated.
What makes this recipe truly foolproof is the simple technique that works every time: steamed cauliflower absorbs the creamy cheese sauce without turning soggy, while the breadcrumb topping creates that irresistible crisp.
No fancy equipment required—just a baking dish, basic pantry staples, and 15 minutes of active prep before baking. The result? A dish that tastes like a home-cooked restaurant special.
By the time it emerges from the oven, you'll have crispy golden edges that shatter at the slightest touch, layers of melted cheddar with that signature stretch, and cauliflower florets that stay tender yet firm.
The aroma alone will have everyone gathering around the table, and the first bite delivers that perfect balance of creamy, cheesy goodness. This is comfort food at its finest—simple yet impressive enough for guests.
Serve it as a side with roasted meats or as a light main with a fresh green salad. The leftovers reheat beautifully too, making it perfect for meal prep. Let's get started on this classic British favorite that's easier than it looks!
Ingredients for basic cauliflower cheese
Pantry staples meet British comfort—crispy, cheesy perfection in one baking dish.
| Ingredient | Amount | Notes |
|---|---|---|
| Fresh Cauliflower 🥬 | 1 whole | Cut into even florets, stems removed |
| Sharp Cheddar Cheese 🧀 | 2 cups | Shredded, 2-year aged preferred |
| Milk 🥛 | 1 cup | Whole milk for creaminess |
| All-Purpose Flour 🌾 | 2 tbsp | For thickening sauce |
| Freshly Grated Nutmeg 🌿 | ¼ tsp | Fine grade for smooth texture |
| Diamond Crystal Kosher Salt 🧂 | 1 tsp | Fine grain preferred |
| Freshly Ground Black Pepper 🌶️ | ½ tsp | Freshly cracked for sharpness |
| Plain Breadcrumbs 🍞 | ¾ cup | Freshly toasted, not pre-seasoned |
| Extra-Virgin Olive Oil 🫒 | 2 tbsp | For crispy topping |
| Butter 🧈 | 2 tbsp | Unsalted, melted for sauce |
| Freshly Squeezed Lemon Juice 🍋 | 1 tsp | Brightens cheese flavor |
| Fresh Chives 🌱 | 2 tbsp | Chopped, for garnish |
The cheese is non-negotiable here. Sharp cheddar with 2-year aging gives that signature tang, but Parmigiano-Reggiano works too for extra richness. I grab mine from Whole Foods or Trader Joe's—their pre-shredded is surprisingly decent (just toss it in a food processor to break up clumps). The breadcrumbs? Freshly toasted in a dry pan until golden—pre-seasoned gets too salty. For the cauliflower, small florets steam faster and stay tender. If yours is huge, cut it into 1.5-inch pieces for even cooking.
No sharp cheddar? Gruyère or Monterey Jack melts beautifully, though Gruyère adds nutty depth. Running low on milk? Heavy cream at half the amount makes the sauce even silkier. The nutmeg is subtle but essential—pre-ground loses potency fast, so buy a tiny bottle and store it in the freezer. For the topping, panko breadcrumbs work in a pinch, but they'll be less crispy. The lemon juice? Freshly squeezed cuts through the richness—bottled won't do. And if you're feeling fancy, add a pinch of smoked paprika to the breadcrumbs for depth.
This reheats like a dream—just 5 minutes at 350°F covered with foil. Keeps 3-4 days in the fridge, though it's best within 2 days for peak crispiness. Freeze portions for up to 3 months—just bake straight from frozen, adding 5-10 minutes to the time. I always make a double batch: one for dinner, one for lunches. The leftovers? Even better the next day as the cheeses meld together.
Why You'll Love This Recipe
- One-Pot Magic: I swear by this recipe—just chop the cauliflower into florets (no need for fancy cuts), toss it in a single pot with milk and flour, and let the cheese do the rest. No extra pans, no mess, just pure simplicity.
- Cheese Overload (In a Good Way): That sharp cheddar—generously grated—melts into a velvety blanket over the cauliflower, while a whisper of nutmeg adds warmth without overpowering. Honestly, the first bite makes me forget this is "basic" anything.
- Leftover Hero: This dish actually tastes better the next day—crispier edges, richer sauce. I portion it into containers before it cools, and suddenly I’ve got zero-effort lunches for the week. (Yes, even on a Tuesday night.)
- Budget-Friendly Luxury: Cauliflower stretches like crazy, and a block of sharp chedddar goes a long way. Between us, this is the kind of recipe that makes you feel fancy without draining your wallet—especially when you’re serving it to guests who’ll swear it’s from a pub menu.
Step-by-step instructions for cheesy crispy cauliflower topping
Here's how to make that irresistible golden crust and stretchy cheese center everyone loves.
Prep the Cauliflower for Perfect Texture
Start by cutting the whole fresh cauliflower into even florets, removing any tough stems. You'll want pieces about 1½ to 2 inches in size—this ensures they cook through without falling apart. Transfer them to a large bowl and toss gently with 1 tablespoon of the extra-virgin olive oil and ½ teaspoon of the diamond crystal kosher salt. This light coating helps develop flavor and prevents sticking later.
Here's the thing—don't skip this step. When you roast cauliflower, you want those florets to stay intact but tender, not mushy. The oil and salt create a barrier that keeps them from absorbing too much moisture from the cheese sauce. Spread the florets on a baking sheet in a single layer, cut-side down, and set aside while you make the sauce.
Make the Ultra-Creamy Cheese Sauce
In a medium saucepan, melt the 2 tablespoons butter over medium heat until it foams. Whisk in the 2 tablespoons all-purpose flour and cook for 1-2 minutes until it forms a smooth paste—this is your roux. The moment it smells nutty is when you're ready for the next step.
Slowly pour in the 1 cup milk while whisking constantly to prevent lumps. Add the 2 cups sharp cheddar cheese, 0.25 teaspoon freshly grated nutmeg, ½ teaspoon freshly ground black pepper, and the remaining ½ teaspoon diamond crystal kosher salt. Stir until completely melted and smooth. For that bright, fresh finish, whisk in the 1 teaspoon freshly squeezed lemon juice. The sauce should coat the back of a spoon but still be pourable—if it's too thick, add a splash more milk.
Assemble and Bake to Crispy Perfection
Preheat your oven to 400°F. Pour the cheese sauce over the cauliflower florets, spreading it evenly so each piece is fully coated. The sauce should look glossy and inviting—this ensures maximum contact for that stretchy, melted goodness.
In a small bowl, mix the 0.75 cup plain breadcrumbs with the remaining 1 tablespoon extra-virgin olive oil. Sprinkle this breadcrumb mixture evenly over the cauliflower, pressing down gently with your fingers. The breadcrumbs will create that coveted crispy crust we're after. Transfer the baking sheet to the oven and bake for 20-25 minutes until the top is deep golden brown and the cheese is fully melted and bubbly.
Remove the cauliflower from the oven and let it rest for 3-5 minutes before serving. This resting time allows the cheese to set slightly, making it easier to serve without a runny mess. The top should be crispy enough to hold its shape when you lift a piece, with that perfect contrast of crunchy breadcrumbs and stretchy cheese underneath. Before serving, sprinkle with the 2 tablespoons chopped fresh chives. This adds a fresh, bright note that cuts through the richness of the cheese. The chives should be finely chopped so they distribute evenly—no big chunks here. Serve immediately while the breadcrumbs are still crisp and the cheese is meltingly gooey. Pair with a simple green salad or crusty bread to soak up every last bit of that cheesy goodness.Finish with Fresh Herbs for Brightness
Pro Tips For Making Basic Cauliflower Cheese
- Cut the Cauliflower Small: Break it into 1-inch florets—no bigger, or the cheese sauce will never fully coat them. I learned this the hard way after serving half-baked florets that looked sad and underdressed.
- Melt Cheese Slowly: Warm the milk first, then stir in the cheese over low heat—high heat turns it grainy. I used to rush it, and the sauce always ended up lumpy, no matter how much I whisked.
- Skip the Pre-Cooked Cauli: Roast the cauliflower until tender but still slightly firm—steaming it first makes it mushy. The texture should hold its shape but yield easily; overcooking is the fastest way to ruin the dish.
- Toast the Flour First: Bloom the flour in the milk for 1-2 minutes before adding cheese—this removes the raw taste and thickens the sauce better. Sounds weird, but it works: the sauce gets richer without tasting like glue.
Troubleshooting perfect results
Sauce Too Thin?
If your cheese sauce is too runny after baking, it’s likely because the roux didn’t cook long enough or the cheese didn’t melt completely. Next time, whisk the flour and butter for 2-3 minutes until golden—this creates a stronger thickening base.
For immediate fixes, mix 1 teaspoon cornstarch with 1 tablespoon cold milk, then stir into the sauce until it thickens. Avoid overmixing after adding cheese, or you’ll end up with lumps. 🧈
Breadcrumbs Not Crispy?
Damp breadcrumbs are the enemy of crispiness. Toast them in a dry skillet over medium heat for 3-4 minutes until golden before mixing with olive oil—this removes excess moisture. For extra crunch, add ½ teaspoon garlic powder to the breadcrumbs before topping.
If your oven runs hot, bake at 375°F instead of 400°F to prevent burning while still achieving crispiness.
Cheese Separating?
This happens when the sauce gets too hot or contains too much liquid. To prevent it, melt the cheese over low heat and whisk constantly. If it starts separating, remove from heat and stir in 1 tablespoon cold milk or a pat of butter to re-emulsify.
For a foolproof blend, use 1 cup sharp cheddar + ½ cup Gruyère—Gruyère’s lower moisture content helps stabilize the sauce. 🧀
Cauliflower Turning Mushy?
Oversteaming or overbaking causes soggy florets. Steam for exactly 8-10 minutes until tender but still firm to the touch—no fork should pierce through easily. After baking, let the dish rest for 5 minutes before serving to allow the cheese to set slightly.
If using pre-cut cauliflower, rinse and pat dry thoroughly to remove excess moisture that can make florets waterlogged.
Top Burns Before Cheese Melts?
This is a classic timing issue. Cover the dish loosely with aluminum foil for the first 15 minutes of baking, then uncover to crisp the breadcrumbs. For even heat distribution, place a baking sheet on the middle rack.
If your oven has hot spots, rotate the dish halfway through baking. A light-colored baking dish (like ceramic) reflects heat better than dark metal, helping the cheese melt evenly.
Leftover Cheese Gets Grainy?
Reheating causes cheese to separate because the sauce loses its emulsified structure. To fix it, sprinkle 1 tablespoon cold water over the top and cover tightly with foil. Microwave on 50% power for 1-2 minutes, stirring halfway.
For stovetop reheating, add 1 tablespoon milk or cream to the sauce and warm over low heat while stirring constantly. Avoid high heat—it breaks down the cheese’s fat and causes graininess. 💡
Nutrition facts
Frequently asked questions
Can I make this with frozen cauliflower instead of fresh?
Fresh cauliflower gives the best texture, but frozen works in a pinch! Thaw and drain the florets completely, then pat them very dry with a kitchen towel to prevent sogginess. For extra insurance, steam the thawed florets for 5 minutes before assembling to remove excess moisture. The sauce will still cling beautifully, though the florets may be slightly softer than fresh.
What's the best cheese substitute if I don't have sharp cheddar?
Gruyère or Monterey Jack work wonderfully—they melt smoothly and add depth. For a dairy-free option, try a blend of vegan cheddar and nutritional yeast (for that umami kick). Avoid pre-shredded cheese (it has anti-caking agents that prevent proper melting). If you're using a milder cheese, add ½ teaspoon smoked paprika to the breadcrumb topping for extra flavor.
How do I make this dish vegetarian-friendly?
This recipe is already vegetarian! For a vegan version, replace the butter with vegan butter or olive oil, use plant-based milk, and swap the cheddar for a high-quality vegan cheese alternative. The breadcrumbs can stay the same—just ensure they're plain (no egg wash). The texture will be slightly different but still delicious. The key is to keep the sauce creamy by whisking constantly while melting the vegan cheese.
Can I prepare this ahead of time for meal prep?
Assemble the dish (cauliflower + sauce) up to 24 hours ahead and refrigerate uncovered. When ready to bake, add the breadcrumb topping and bake at 400°F for 15-20 minutes (cover with foil for the first 10 minutes to prevent over-browning). For freezing, bake completely first, then cool, wrap tightly in foil, and freeze for up to 3 months. Reheat covered with foil at 350°F for 10 minutes to restore crispiness.
Why does my cheese sauce sometimes separate or get grainy?
This usually happens from too much heat or liquid. To fix it, whisk in 1 tablespoon cold milk or cream while off heat to re-emulsify. For prevention, melt cheese over low heat and whisk constantly. A 50/50 blend of sharp cheddar and Gruyère (or Monterey Jack) melts more smoothly. If reheating leftovers, add 1 tablespoon milk and warm gently—never microwave on high.