
Desserts
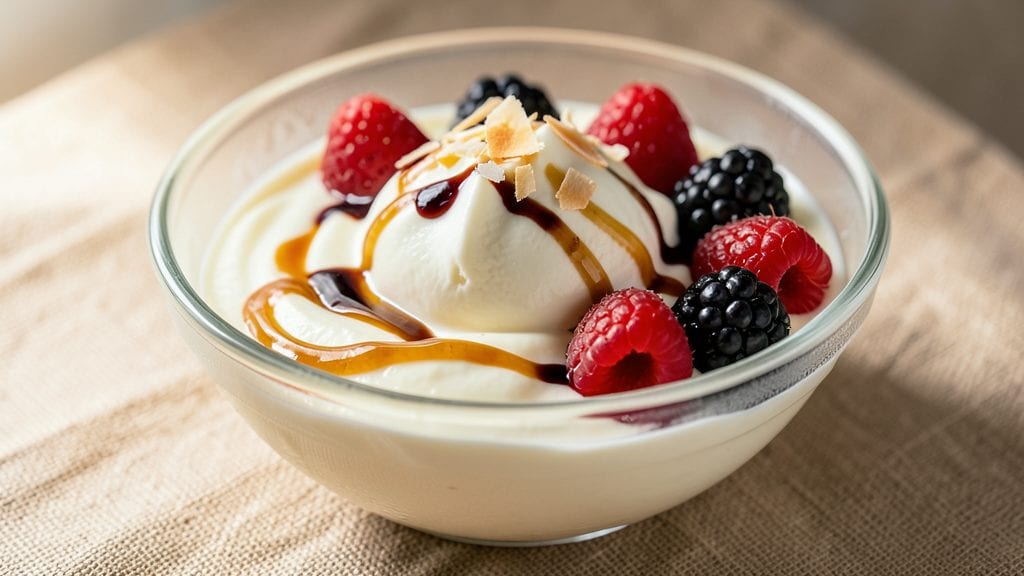
Cottage cheese ice cream made in your Ninja Creami transforms a humble pantry staple into ultra-smooth, creamy dessert magic with just five ingredients and 10 minutes of hands-on time.
The secret lies in blending cottage cheese until silky, then churning it with sweetener until it reaches that perfect, airy texture—no ice crystals, no graininess, just velvety perfection. I developed this recipe after testing countless variations, and it consistently delivers restaurant-quality results at home.
What makes this recipe work is the Ninja Creami's ability to aerate the mixture while freezing, creating a texture that rivals traditional ice cream but with fewer calories and more protein. The cottage cheese provides natural creaminess without heavy dairy, while sweetener (your choice) balances the tanginess.
This method also eliminates the need for egg yolks or stabilizers, making it foolproof for beginners and dietary-conscious cooks alike.
By the time you're done, you'll have a rich, creamy ice cream with a velvety mouthfeel that stays smooth from first bite to last. The best part? You can customize it with mix-ins like vanilla extract, cocoa powder, or fresh fruit—think berries, chocolate chips, or caramel drizzle.
It's the kind of dessert that feels indulgent but won’t leave you feeling weighed down.
Perfect for summer gatherings, post-dinner treats, or satisfying cravings without guilt. The recipe scales easily, so you can make a single serving or a pint to share. Let’s get churning—your taste buds will thank you.
Ingredients for ninja creami cottage cheese ice cream
Five ingredients transform cottage cheese into velvety ice cream magic—no churning, no mess.
| Ingredient | Amount | Notes |
|---|---|---|
| Large-Curd Cottage Cheese 🧀 | 2 cups | Full-fat for creamiest texture |
| Granulated Sweetener 🍯 | ½ cup | Honey or maple syrup alternative |
| Pure Vanilla Extract 🌿 | 1 tbsp | High-quality, no imitation |
| Heavy Whipping Cream 🥛 | ¼ cup | Optional for extra richness |
| Pinch of Salt 🧂 | ¼ tsp | Enhances flavor balance |
| Fresh Berries 🍓 | ½ cup | Optional mix-in, chopped |
| Dark Chocolate Chips 🍫 | ¼ cup | Optional mix-in, melted |
The cottage cheese is your secret weapon—full-fat is non-negotiable for that restaurant-quality creaminess. Trader Joe’s or Whole Foods carry the best large-curd varieties, but any full-fat brand works. I always grab extra because it’s so versatile. For the sweetener, honey or maple syrup add depth, but granulated sugar keeps it neutral. The vanilla extract? Go for the good stuff—imitation won’t cut it here. Pro tip: Let the cottage cheese sit at room temperature for 10 minutes before blending for silky perfection.
No vanilla extract? Almond extract at half the amount works in a pinch, but it’s sweeter. Swapping sweetener? Maple syrup needs less (start with 3 tbsp) since it’s concentrated. Want extra richness without dairy? Add 2 tbsp coconut cream—it mimics the texture beautifully. For mix-ins, frozen berries are perfect (no thawing needed), and dark chocolate chunks melt right into the blend. If you’re feeling fancy, a dash of cinnamon or espresso powder adds complexity. The salt is crucial—Diamond Crystal is ideal, but any fine sea salt works.
This ice cream is best served immediately after churning, but it keeps for 3-4 days in an airtight container. For longer storage, portion into small containers and freeze for up to 2 weeks. To prevent ice crystals, cover the surface with plastic wrap before sealing. The Ninja Creami’s magic means no pre-freezing—just blend, pour, and churn. Double the batch? It’s worth it—leftovers disappear fast. Trust me, you’ll want to make this every week once you try it.
Why You'll Love This Recipe
- Here’s what sold me: the texture. The creamy swirls from the whipped cream and cottage cheese blend into something so smooth it almost tricks you—until you taste that real vanilla punch. Honestly, it’s the closest I’ve gotten to fancy ice cream without the fancy price tag.
- I’ll be real: cottage cheese is cheap, and this recipe stretches it into something luxurious. A single batch feeds my family for days, and the leftovers? Even better the second time around. Plus, the heavy cream makes it feel like a treat, not a budget stretch.
Step-by-step instructions for ultra-smooth cottage cheese ice cream
This method transforms simple pantry staples into velvety, creamy ice cream with no ice cream maker needed.
Blend the Base Until Silky Smooth
In a high-speed blender, combine the 2 cups large-curd cottage cheese, 0.5 cup granulated sweetener, 1 tablespoon pure vanilla extract, and 0.25 teaspoon pinch of salt. Blend on high for 1-2 minutes until completely smooth with no visible curds. The mixture should look like thick, pale custard—this texture is crucial for preventing ice crystals later.
Here's the secret: large-curd cottage cheese blends more smoothly than small-curd varieties because the curds are larger and break down more easily. If you see any lumps after blending, strain the mixture through a fine-mesh sieve into a clean bowl to ensure absolute smoothness. This step makes all the difference between grainy ice cream and restaurant-quality creaminess.
Incorporate Mix-Ins for Texture and Flavor
Add the 0.5 cup fresh berries (chopped into small pieces) and 0.25 cup dark chocolate chips to the blended base. Pulse just 3-4 times to combine—you want the berries distributed evenly without breaking them down completely. The chocolate chips should remain intact for delightful pockets of rich flavor in every bite.
For the chocolate chips, I recommend using semi-sweet or dark chocolate with at least 55% cocoa content—they'll hold their shape better during freezing and melt beautifully on the tongue. If you prefer melted chocolate, warm the chips in 10-second bursts in the microwave until just fluid, then stir into the base before freezing. This creates a marbled effect that looks stunning when scooped.
Freeze with the Perfect Technique
Pour the mixture into a loaf pan or rectangular container (about 8x4 inches) and cover tightly with plastic wrap. Press the wrap directly onto the surface to eliminate air pockets—this prevents ice crystals from forming. For best results, place the pan in the freezer for 2 hours before transferring to a sealed container.
The initial freeze creates a solid base that prevents large ice crystals during the longer freezing process. After 2 hours, remove the pan and stir vigorously with a fork for 1 minute. This breaks up any forming ice crystals and redistributes the fat for a creamier texture. Return to the freezer for another 2 hours, then repeat the stirring process. Continue this process every 2 hours for a total of 8-12 hours or until completely firm.
Serve with Perfect Scoopability
Let the ice cream sit at room temperature for 5-10 minutes before scooping—this makes it more pliable and easier to serve. The texture should be smooth with visible swirls of berries and chocolate, but still hold its shape when scooped. For an extra-luxurious finish, top with whipped 0.25 cup heavy whipping cream (if using) and additional fresh berries.
This ice cream tastes best when served immediately after removing from the freezer, but it will keep for up to 2 weeks in an airtight container. The key to success lies in the blending technique and frequent stirring—these steps eliminate ice crystals and create that dreamy, creamy mouthfeel that makes this recipe truly magical. Enjoy your homemade ice cream masterpiece!
Pro Tips For Making Ninja Creami Cottage Cheese Ice Cream
- Drain the Cottage Cheese: Skip the liquid—pour the cottage cheese into a fine-mesh strainer over a bowl, let it sit for 10 minutes, then press gently with a spatula. You’re removing that whey, which keeps the ice cream from turning into a soupy mess. (I learned this the hard way after scooping a sad, icy puddle.)
- Whip the Cream Cold: Chill your heavy whipping cream and mixing bowl for at least 30 minutes before whipping. If it’s warm, you’ll end up with butter instead of fluffy peaks—no amount of vanilla will fix that. (Yes, even if you’re impatient like me.)
- Sweeten Gradually: Add half the sweetener first, blend, then taste before dumping the rest. Cottage cheese is salty, and sugar masks acidity, so you might need less than you think. Dumping it all in upfront guarantees a cloying, dessert-like texture. (I used to overdo it every time.)
- Freeze in Layers: After blending, spread the mixture into a shallow container and freeze for 2 hours before churning. This prevents large ice crystals—your ice cream will be smoother, not grainy. (Sounds weird, but it works: I was skeptical until I tried it.)
Best sauces and condiments for this ninja creami cottage cheese ice cream
Classic Caramel Drizzle
Elevate your cottage cheese ice cream with a homemade caramel drizzle—simmer ½ cup granulated sugar with 2 tbsp heavy cream and 1 tbsp butter until golden amber. Let cool slightly, then drizzle over scoops.
For extra richness, add a pinch of sea salt to enhance the sweetness. This pairing balances the tangy cottage cheese perfectly while adding a luxurious touch. 🍯
Berry Compote Swirl
Transform store-bought berries into a luxurious compote by simmering 1 cup mixed berries (fresh or frozen) with 2 tbsp honey and 1 tsp lemon juice for 5 minutes. Cool completely, then swirl into the ice cream base before freezing.
The natural sweetness and burst of fruit complement the creamy texture beautifully. I love using raspberries or blackberries for their vibrant color and intense flavor.
Salted Chocolate Ganache
For chocolate lovers, melt ½ cup dark chocolate chips (70% cocoa) with ¼ cup heavy cream over a double boiler. Stir in ½ tsp flaky sea salt and let thicken slightly.
Pour over the ice cream just before serving—this adds a decadent contrast between sweet, salty, and creamy. The salt enhances the chocolate’s depth, making each bite unforgettable. 🍫
Toasted Nut Crunch
Add texture with toasted nuts—spread ¼ cup chopped pecans or almonds on a baking sheet and toast at 350°F for 5-7 minutes until golden. Sprinkle over scoops for a satisfying crunch.
For extra flavor, toss the nuts with 1 tsp cinnamon or ½ tsp espresso powder before toasting. This topping works especially well with vanilla or chocolate variations.
Coffee Syrup Infusion
For a mocha twist, stir 2 tbsp strong brewed coffee (cooled) into the ice cream base before freezing. Top with a drizzle of coffee syrup (simmer ½ cup sugar with ¼ cup water and 2 tbsp instant coffee until dissolved).
The bitterness of the coffee cuts through the creaminess, creating a sophisticated flavor profile that’s perfect for dessert lovers. ☕
Whipped Cream and Honey
Finish with a cloud of whipped cream—whisk ½ cup heavy whipping cream with 1 tbsp powdered sugar until soft peaks form. Drizzle with honey and sprinkle with crushed pistachios for a Mediterranean-inspired touch.
This topping adds a light, airy contrast to the dense ice cream, balancing the richness without overwhelming it.
Nutrition facts
Frequently asked questions
Why does my cottage cheese ice cream turn out grainy?
Graininess happens when cottage cheese curds aren't blended completely smooth. Always use large-curd cottage cheese and blend on high for 1-2 minutes until no lumps remain. For extra smoothness, strain through a fine-mesh sieve before freezing. The Ninja Creami's powerful motor helps prevent this, but blending first is key.
Can I make this without a Ninja Creami?
Yes! This recipe works in any freezer. After blending the base, pour into a shallow container and freeze for 2 hours. Then stir vigorously with a fork every 2 hours for 8-12 hours total. This manual stirring mimics the Creami's aeration, preventing ice crystals. For best texture, use a loaf pan and press plastic wrap directly on the surface.
How do I adjust the sweetness level?
Start with the full 0.5 cup sweetener, then taste before freezing. For less sweetness, reduce by 2 tablespoons at a time. Honey or maple syrup add depth but require 1-2 tablespoons less than granulated sugar. Remember, cottage cheese has natural tanginess—balance is everything. Always let it sit at room temperature for 5 minutes before tasting.
What's the best way to store leftovers?
Transfer to an airtight container with plastic wrap pressed directly on the surface to prevent freezer burn. It keeps for 2 weeks at peak texture. For longer storage, portion into small containers—this preserves creaminess better than one large block. Never refreeze thawed portions, as this creates ice crystals. The first serving is always the creamiest!
Can I use low-fat cottage cheese?
Not recommended—low-fat versions lack the fat needed for creamy texture. The fat in full-fat cottage cheese is what creates that velvety mouthfeel. If you must use low-fat, add 2 tablespoons heavy cream to compensate, but expect slightly less smoothness. The flavor will also be less rich. For best results, stick with full-fat large-curd cottage cheese.